How to Add PayPal Gateway to WooCommerce
“Integrate PayPal into WooCommerce effortlessly. Secure payments for startups and established businesses. Follow simple steps in this guide.

PayPal is one of the most popular payment gateways in the world. Besides, it’s a highly flexible and secure payment gateway for e-commerce startups and established online businesses. If you have a WooCommerce store, you can easily enable the PayPal gateway on WooCommerce with your site and start accepting payments with it.
To add PayPal gateway to WooCommerce, log into WordPress and head over to WooCommerce > Settings > Payments. Find “PayPal” from the list of payment gateways and toggle it to On.
In this post, I’ll share the easy steps to add a PayPal gateway to WooCommerce. Let’s get started!
1. Install WooCommerce PayPal Payments
The first step is to install and activate the WooCommerce PayPal Payments plugin. The handy plugin lets you integrate PayPal with your WooCommerce store, allowing you to accept payments without a hassle.
Here are the step-by-step instructions to install the plugin:
- Go to Plugin > Add New from your WordPress dashboard.
- Search for “WooCommerce PayPal Payments” and install the plugin.
- Activate the plugin.

2. Go to WooCommerce settings
The next thing you need to do is get to the WooCommerce settings page in your WordPress dashboard.
- Click on the “WooCommerce” tab on the left side of your WordPress dashboard.
- Select the “Settings” option from the menu on your left.
- Go to Payments. You’ll be taken to a page with all the different payment options available for your store.

3. Click on “PayPal” on the Payments page
On the Payments page, you can see different payment options already enabled in your store.
- To enable PayPal gateway in your WooCommerce site, click on the PayPal option.
- Alternatively, look for the toggle next to PayPal Checkout and click it. That will enable PayPal as a payment option.
4. Configure your settings
Now that you have enabled PayPal, it’s time to configure some settings.
- Click on the “Set up or Manage” button. That will take you directly to the configuration page for PayPal Checkout.
- On this page, enter your credentials, such as your business name, email address, and other relevant details, so your customers can make payments through PayPal. Ensure these details are correct before continuing with the setup process.
5. Test your PayPal configuration
It’s a good idea to test your PayPal configuration to ensure everything is working correctly.
Go through the purchasing process in your store, starting from adding a new product and proceeding to the checkout page.
If everything is working correctly, you should be able to make payments through PayPal as a payment option in your WooCommerce store without any issues.
6. Add CollabPay to WooCommerce (optional)
CollabPay is an app that we created to allow store owners to automate the process of paying people a cut or share of your store’s product sales.
For example, if you created a product with another company and are going 50/50 on the profits split, you can now automate them getting paid their 50% cut of the profits.
CollabPay allows you to deduct the tax, shipping costs, and gateway fees before the 50/50 split are calculated. Meaning you only pay 50% of the profits.
Learn more about CollabPay and how it works.
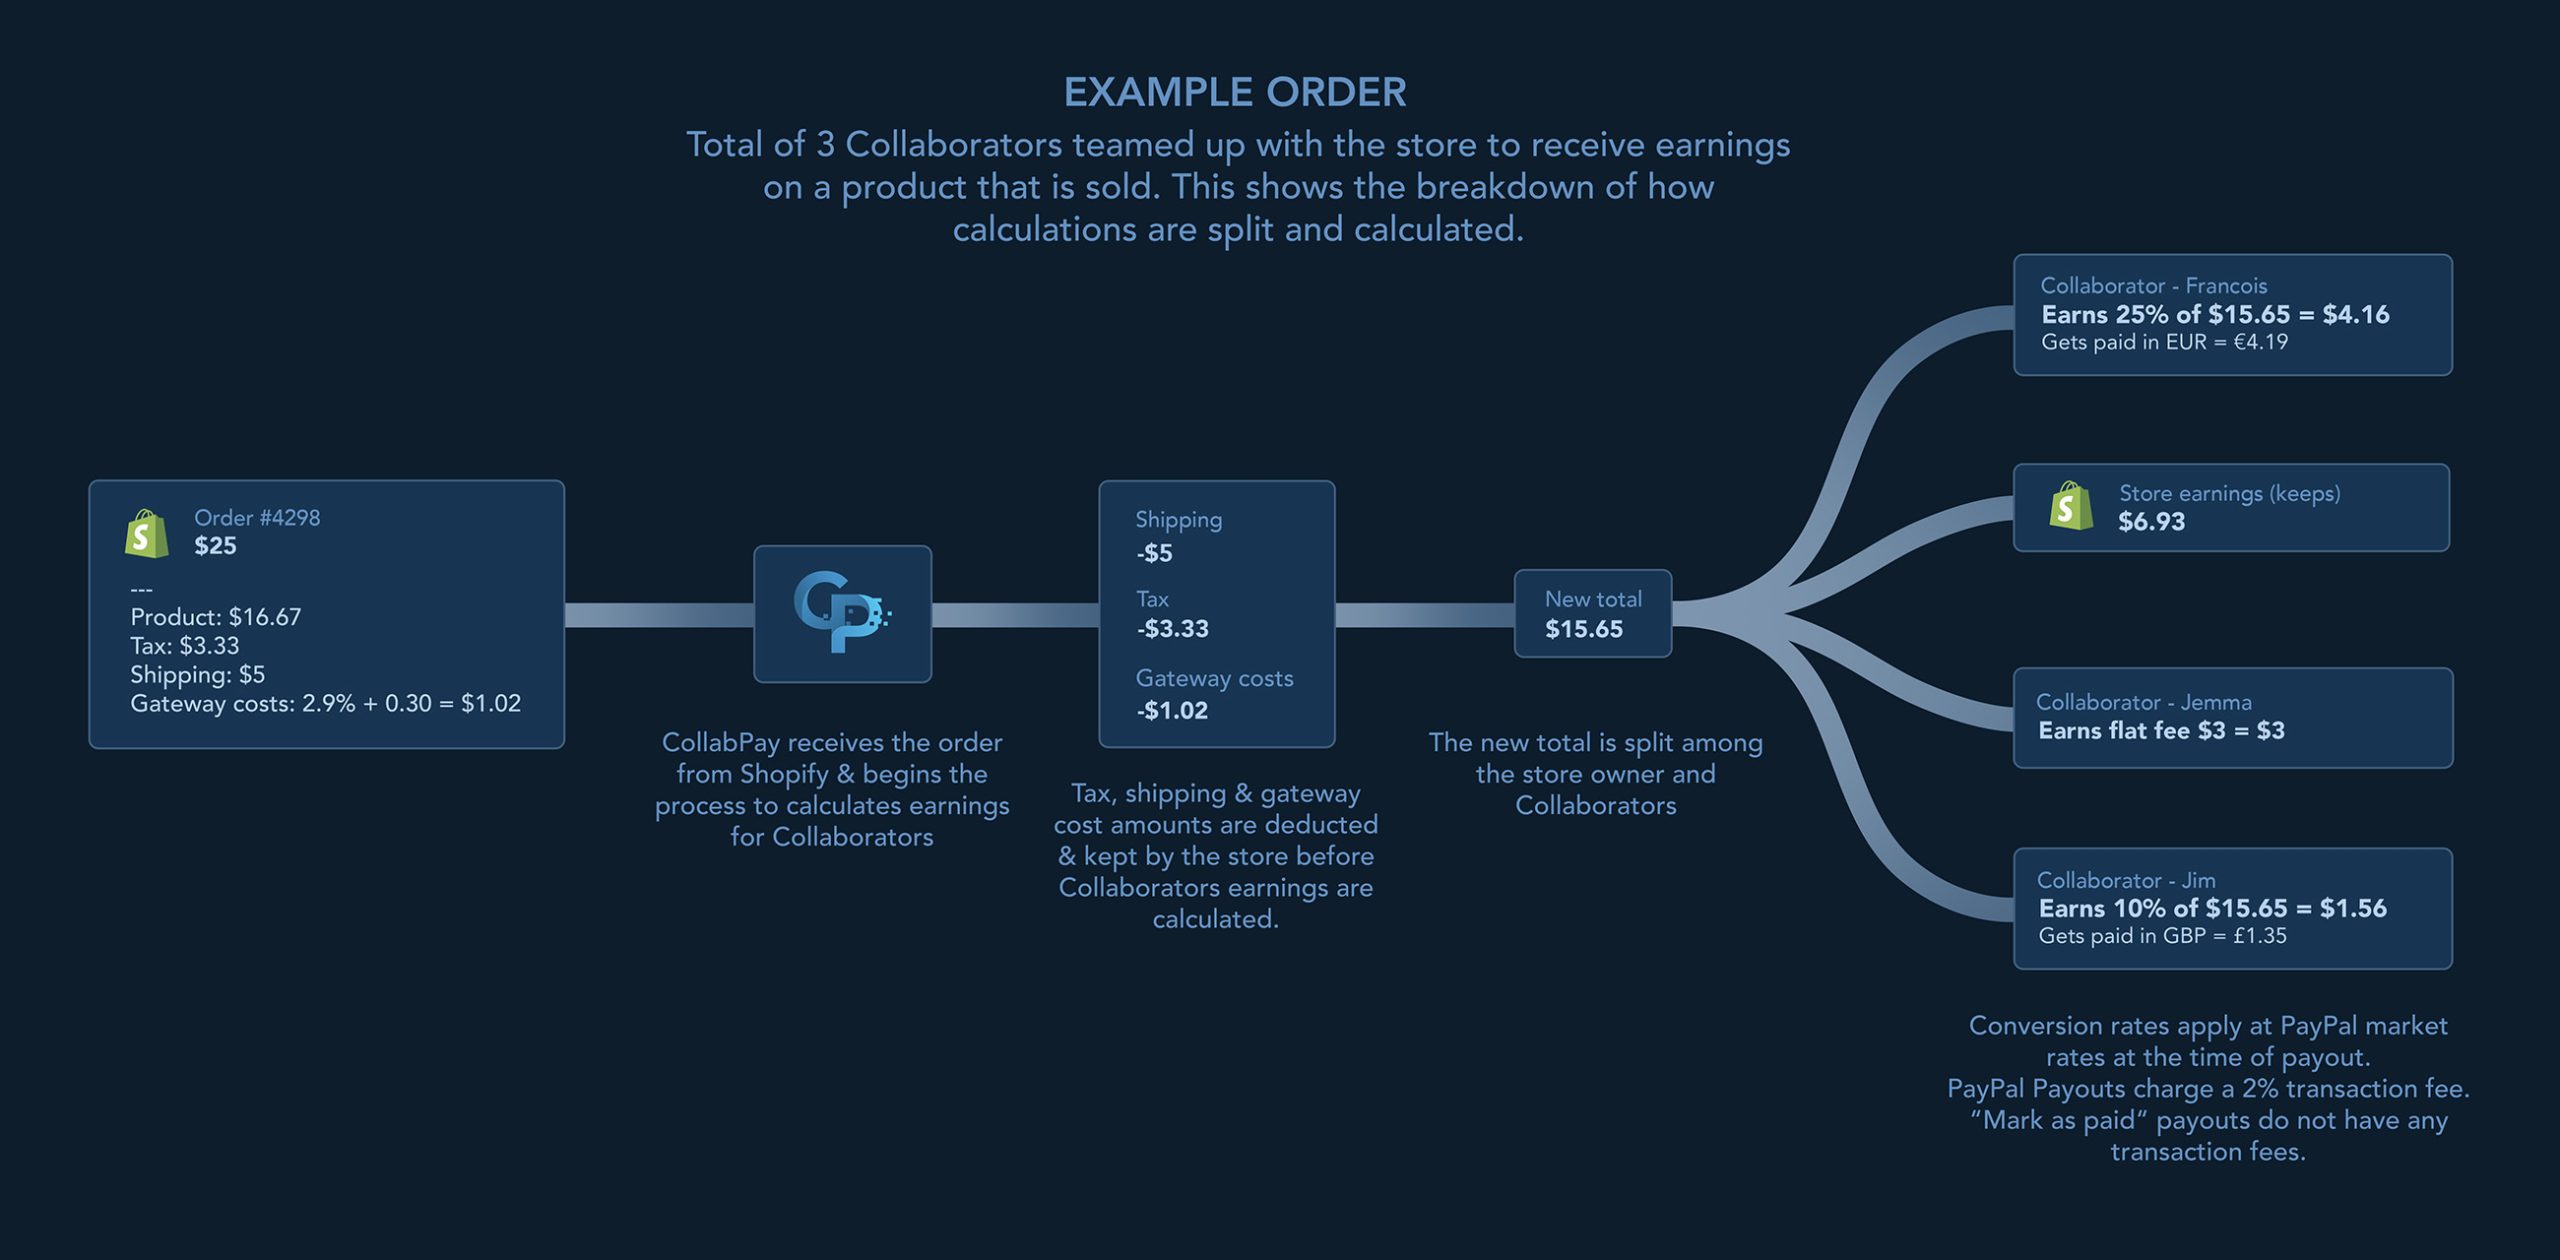
CollabPay has a WordPress plugin that connects with your WooCommerce store to read your orders and calculate the profits to be paid to your Collaborators.
You can also connect your PayPal account to CollabPay to pay your Collaborators.
Video walkthrough
Tip: If you’re stuck at any point, consult the following video tutorial to help you get through the process:
Conclusion
Setting up a PayPal gateway on WooCommerce is straightforward. All you need to do is:
- Enable the PayPal option in your store’s settings.
- Enter some basic business details.
- Configure other settings, such as currency and language.
- Test your PayPal configuration to ensure everything is working correctly.
Check this article if you want to set up Stripe on WooCommerce.
Ready to dive in?
Automatically calculate, split & pay profits to product creators, influencers or sales reps! Start your 7-day free trial today.