How to Add Stripe Gateway to WooCommerce
Learn how to add the Stripe gateway to WooCommerce. Plus an extra add-on that will speed up your workflow.

Table of Contents
- 1. Install WooCommerce and activate the Stripe plugin
- 2. Generate the API keys
- 3. Configure your settings
- 4. Test your setup
- 5. Go live after testing the gateway
- 6. Add CollabPay to WooCommerce (optional)
- Conclusion
If you own a WooCommerce store, you know how important it is to have secure payment options for your customers. One of the most popular payment gateways is Stripe, which allows eCommerce businesses to take online payments for their products and services through different payment methods. But how do you add Stripe gateway to WooCommerce?
To add Stripe gateway to WooCommerce, go to Plugins > Add New. Search for “WooCommerce Stripe Payment Gateway” and click “Install Now”. Finally, go to WooCommerce > Settings > Checkout and select Stripe from the list of options.
Read on for a detailed tutorial on how to add Stripe gateway to WooCommerce.
1. Install WooCommerce and activate the Stripe plugin
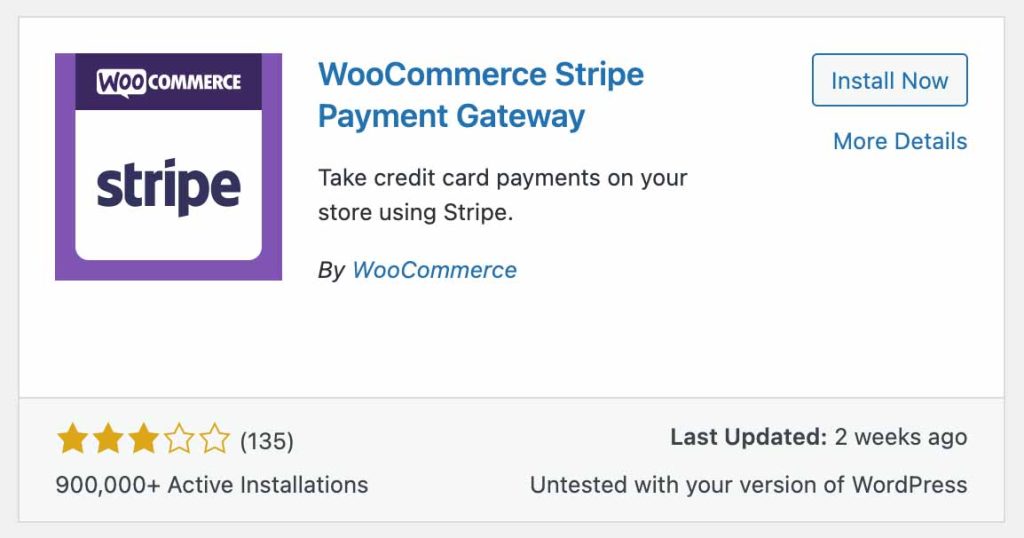
The first step is to install the WooCommerce plugin on your website. That will give you access to all the features and settings needed for setting up a payment gateway. Once that’s done, you’ll need to activate the WooCommerce Stripe Payment Gateway Plugin:
- Go to Plugins > Add New.
- Search for WooCommerce Stripe Payment Gateway.
- Click the Install Now button. That will allow you to enable your store to accept payments from customers using Stripe.
Please Note: WooCommerce Payments must be disabled so that all order payments go to your stripe account and payouts can be made to collaborators. CollabPay cannot automate payouts when WooCommerce Payments is in use.
2. Generate the API keys
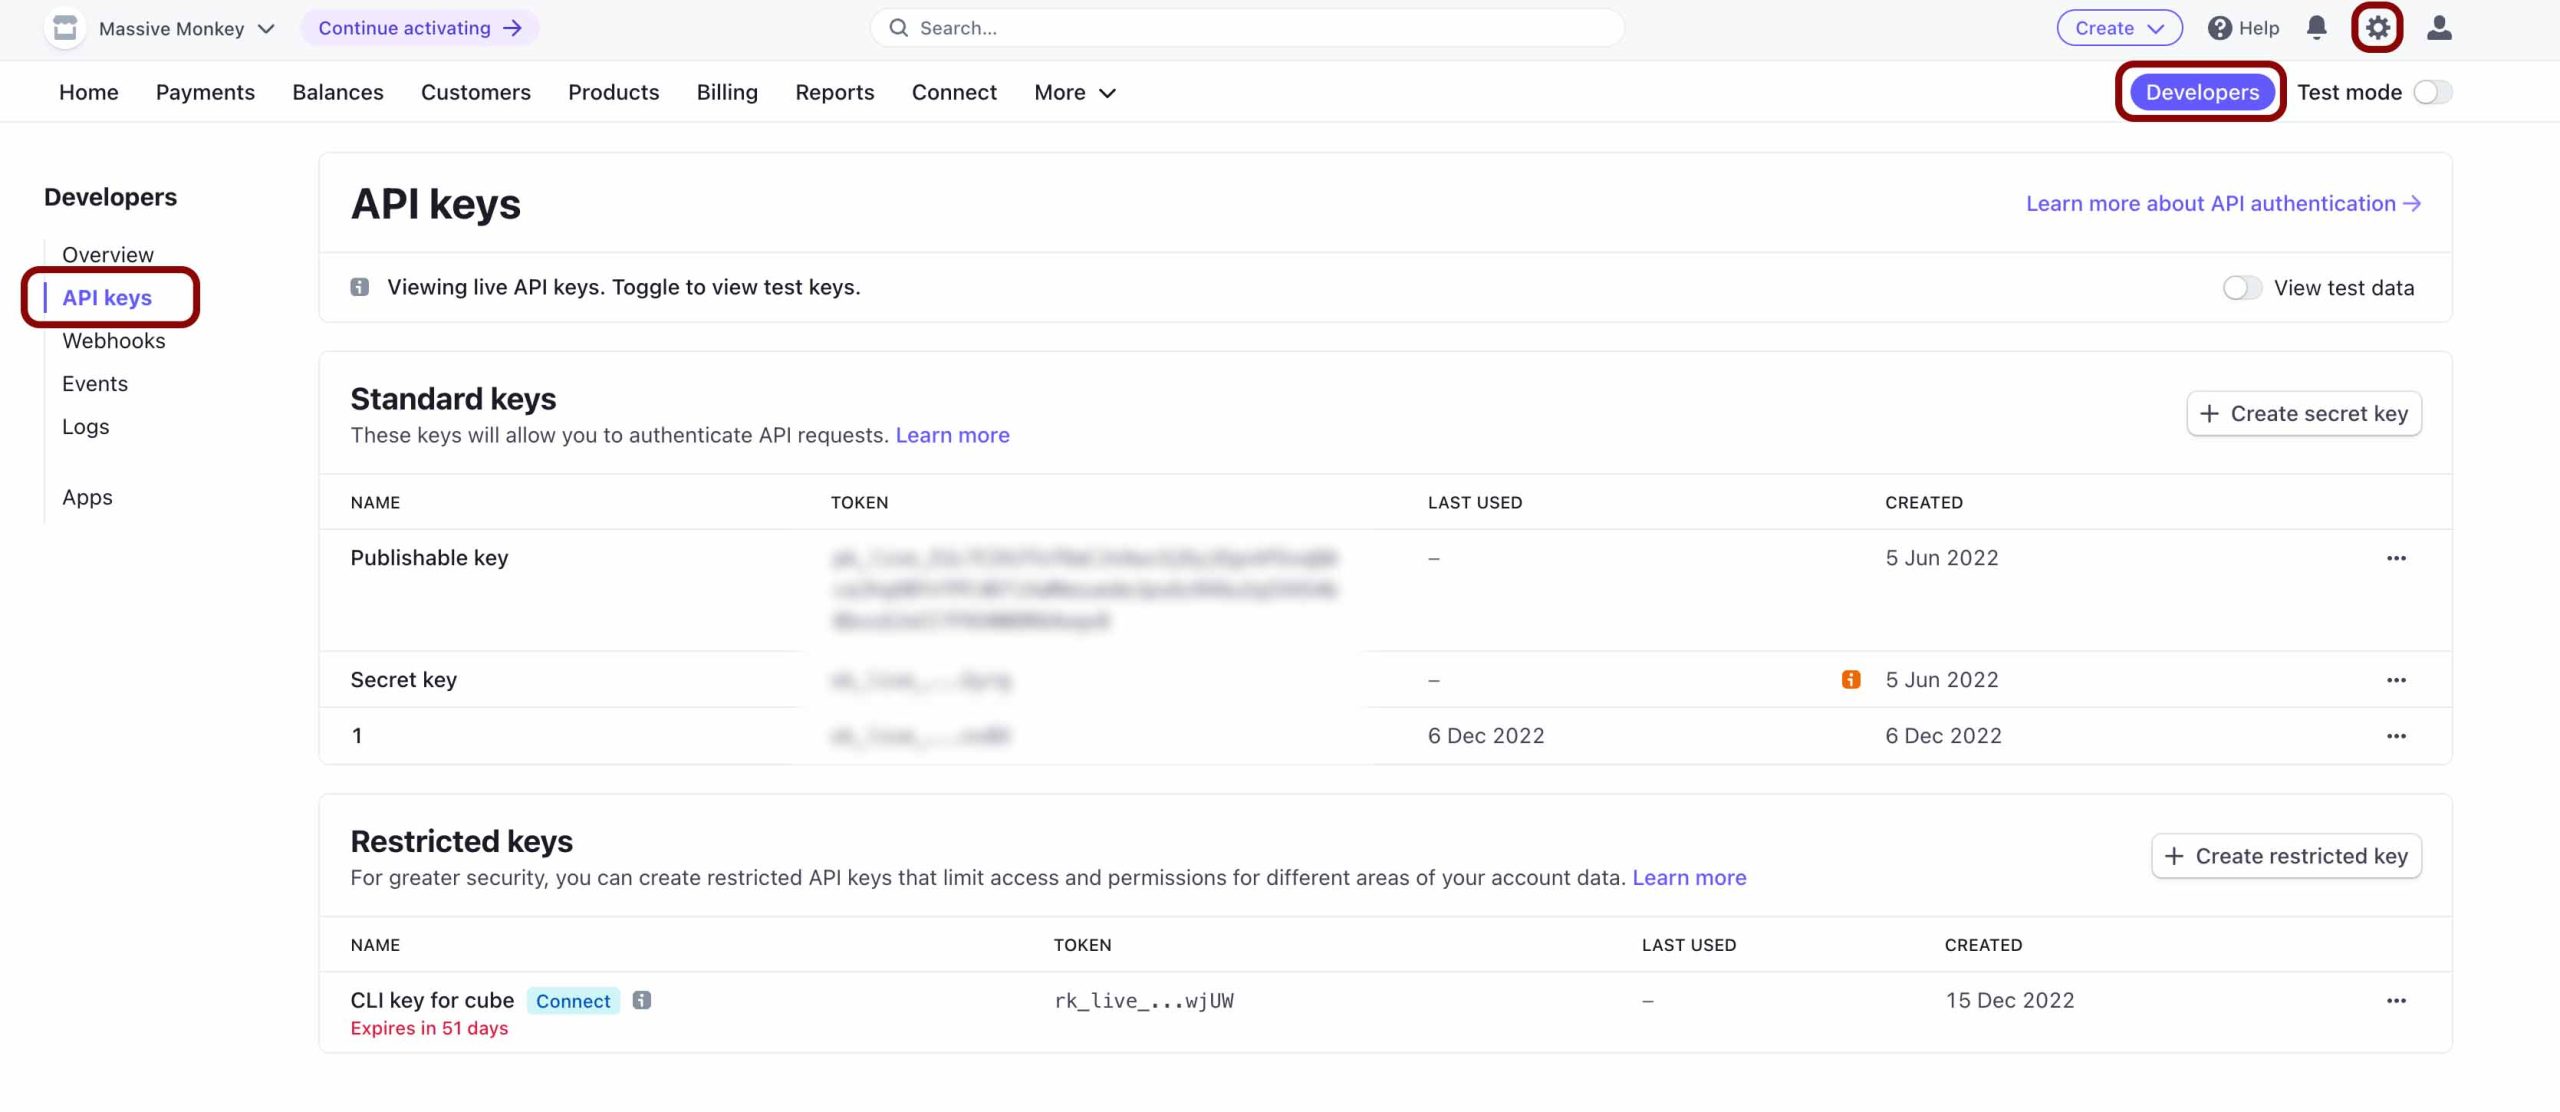
Next, you will need to generate API keys for your account for WooCommerce and Stripe to communicate securely with each other. To do that:
- Log into your Stripe account or sign up if you don’t have an account.
- Go to Your Account > Developers > API keys.
- Click Generate API Keys. That will generate two API keys – one test key (for testing purposes) and one live key (for live transactions).
3. Configure your settings
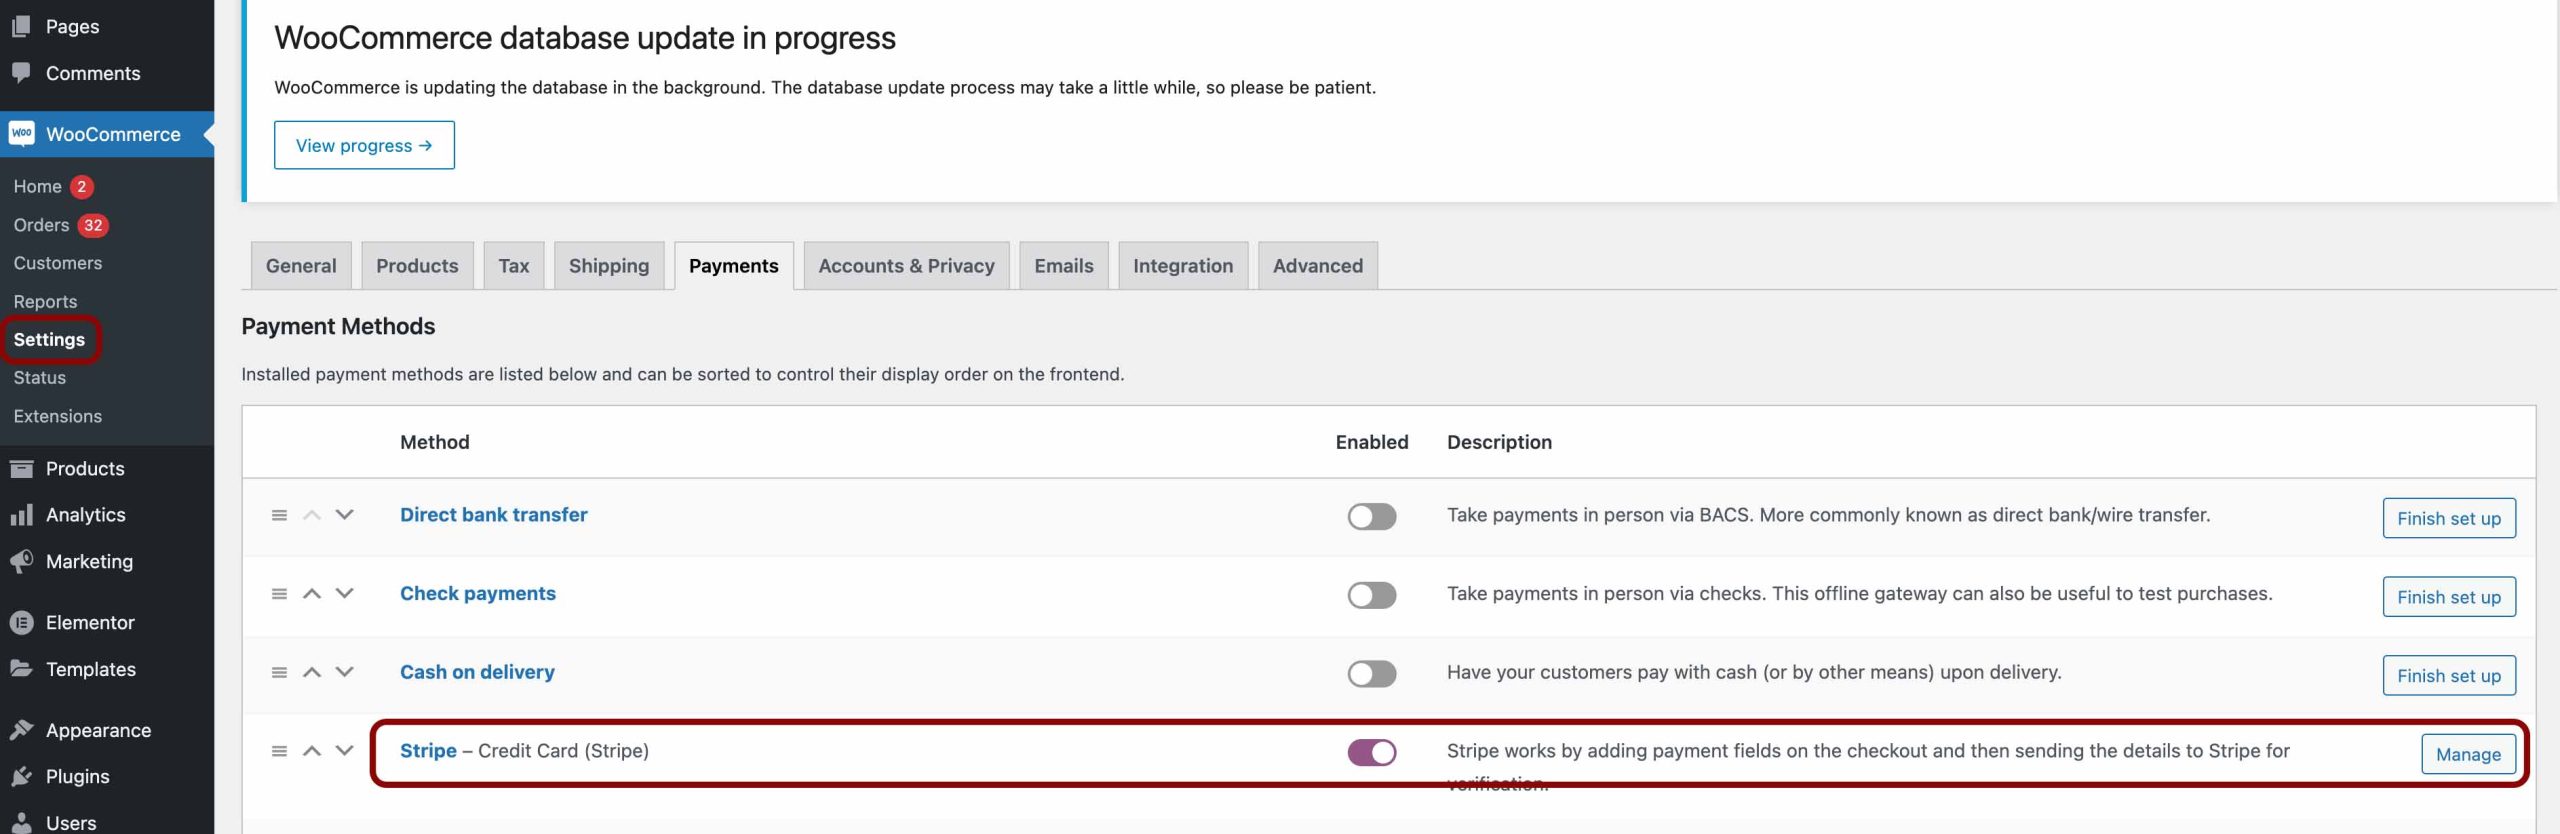
Now that you have generated the necessary API keys, it’s time to configure your settings in WooCommerce so that customers can pay using their credit cards or debit cards via the Stripe checkout page. To do that:
- Log into WordPress and go to WooCommerce > Settings > Checkout.
- Select Stripe from the list of options.
- Save changes.
4. Test your setup
Once everything is set up correctly, it’s time to test your setup before going live with real transactions. To do that:
- Ensure Test Mode is enabled in the Settings tab of the Stripe Payment Gateway Plugin in WordPress admin.
- Then use a valid test card number, such as 4242 4242 4242 4242, along with any random expiration date and CVV code to simulate a successful transaction on the checkout page of your store.
5. Go live after testing the gateway
Now that everything is tested successfully, it’s time for you to go live with actual transactions.
All you need to do now is disable Test Mode in the “Settings” tab of the Stripe Payment Gateway Plugin page in the WordPress admin area. After that, customers can start paying through their credit or debit cards via the Stripe checkout page on your store.
6. Add CollabPay to WooCommerce (optional)

CollabPay is an app that we created to allow store owners to automate the process of paying people a cut or share of your store’s product sales.
For example, if you created a product with another company and are going 50/50 on the profits split, you can now automate them getting paid their 50% cut of the profits.
CollabPay allows you to deduct the tax, shipping costs, and gateway fees before the 50/50 split are calculated. Meaning you only pay 50% of the profits.
Learn more about CollabPay and how it works.
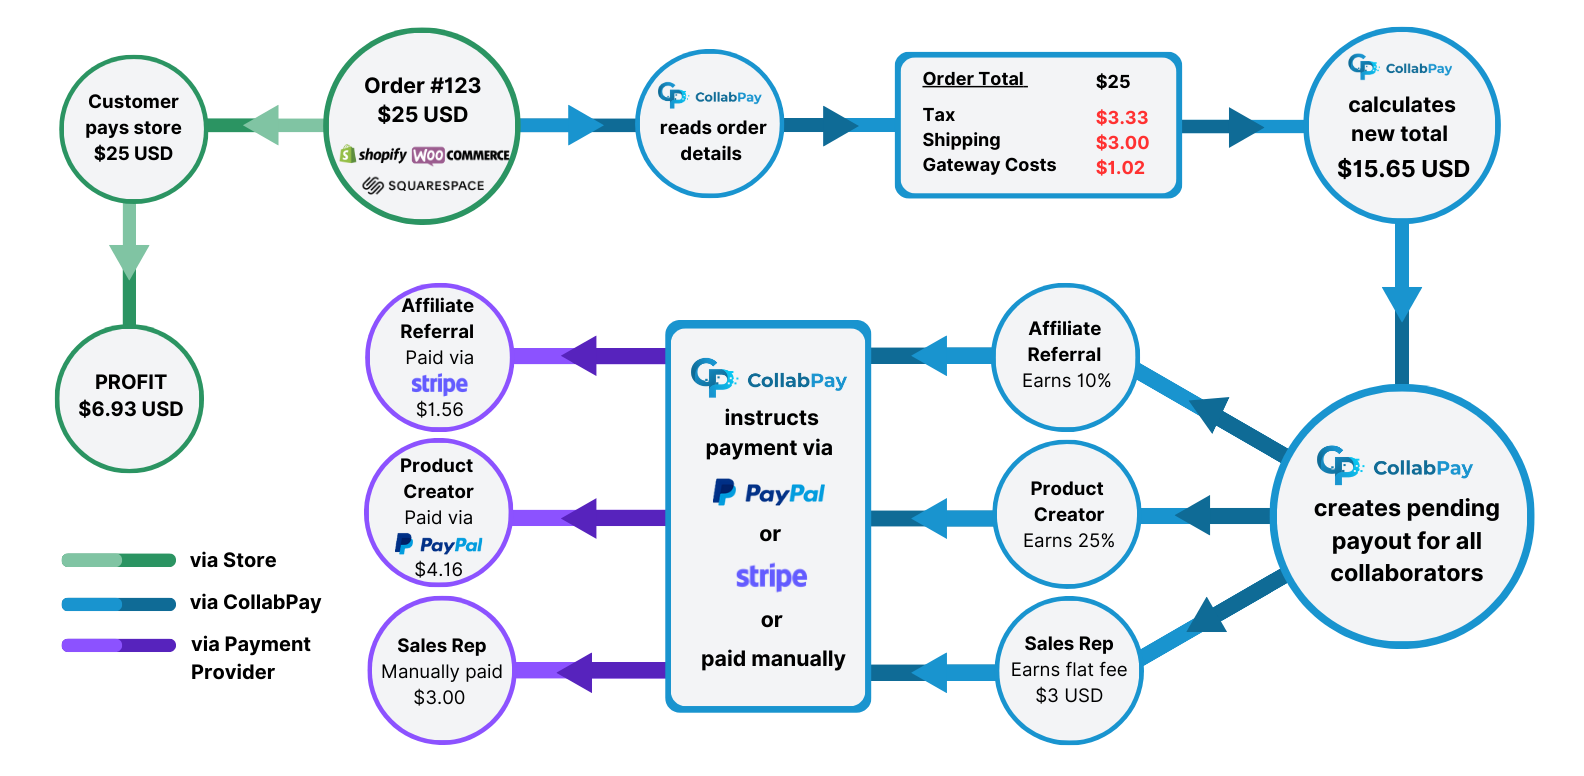
CollabPay has a WordPress plugin that connects with your WooCommerce store to read your orders and calculate the profits to be paid to your Collaborators.
You can also connect your Stripe account to set up automatic payouts.
Conclusion
Adding a payment gateway like Stripe to your WooCommerce store can help you boost sales and increase conversions. With the steps above, you should be able to set up the Stripe gateway on your store easily and start accepting secure payments from your customers right away.
Remember to test your setup thoroughly before going live with real transactions to avoid issues and ensure your customers have a smooth checkout experience on your store!
Read this guide to learn how to add PayPal gateway to WooCommerce.
Ready to dive in?
Automatically calculate, split & pay profits to product creators, influencers or sales reps! Start your 7-day free trial today.


Next post
How to Add PayPal Gateway to WooCommerce